Cutting Sink Hole
Contact UsCutting Sink Cut Out
Cutting the sink cutout in a countertop is a straightforward procedure, but it must be done accurately.
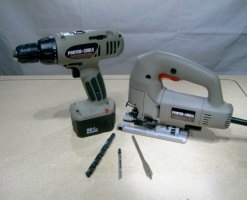
Tools needed are; jigsaw, jigsaw blade, power drill, drill bit (Fig. 1), tape measure, saw horses, straight edge, and pencil or marking pen.
Steps to Cutting Sink Cut Out
- Place countertop on padded sawhorses laminate side down. Allow for the open area below the position of the sink cutout.
Locate the center of the sink on cabinets. Take the accurate measurement and write measurement down on paper for reference. If cabinets butt into a wall, it is best to measure from the wall to the center of the sink. If you must measure from the open end of the cabinet, take into consideration any countertop overhang and add to measurement. - Transfer measurement from the appropriate end of countertop to center of the sink and make a line. This is the centerline of the sink.
- If you are installing a new sink, the manufacturer provides a template, follow the manufacturer’s instructions for cutting out the template.
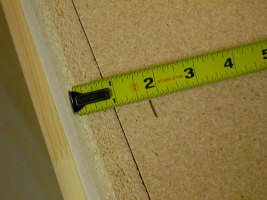
- On the countertop measure 1-3/4″ from the back of cove stick (Fig.2) toward the front of the countertop. This measurement works for most standard 22″ X 33″ sinks (double-check measurement with your sink), other size sinks will require you to determine a new measurement that will center the sink front to back in the cabinet. If the sink is placed too far toward the nose of the countertop, sink clips may be above the face frame of cabinet making it difficult to tighten screws when the sink is installed after countertops are fastened to cabinets. Mark distance with a pencil in several places and connect lines with a straight edge. This only needs to be done in the general area of the sink cutout. Now position the back edge of the template along this line, while maintaining centerline position. Once these two dimensions are established you are ready to trace around the template (Fig.3). Check and double-check measurements, a mistake here may ruin the countertop.
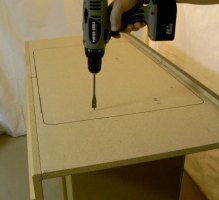
- Use a power drill and drill bit (twist drill or spade bit), sized a little larger in diameter than the jigsaw blade (Fig.4) to make a pilot hole for the jigsaw blade. Drilling holes from the underside of the countertop will cause the laminate to crack around the hole, making a pilot hole well inside of the sink outline to allow for cracking.
- Use a jigsaw, with a jigsaw blade that has a cutting length of at least 1-1/2″. Use the pilot hole to start cutting. Follow the line and cut toward the front (nose) of the countertop. As you get closer to the nose you may find there is not enough clearance for the base of the saw to follow the line. In this situation, you can place a scrap piece of 3/4″ thick material along the inside of the line. Place base of saw on scrap material and nose stick (Fig.5) following line until you no longer need the scrap piece. The sink cutout is heavy and needs to be supported as the cut is completed, so it doesn’t crash to the floor.
- Check sink in the cutout. If it fits you are done. If it doesn’t fit, find the area that is binding and remove more material. You could use; a belt sander, jigsaw, sanding block, wood rasp, or coarse file. Sand or file in a direction toward the particle board to reduce laminate chipping. Remove material until sink fits loosely in the cutout.
Tip: After fitting sink to cutout and the countertop is scribed and ready for installation, it is easier in most circumstances to install the faucet and sink into the countertop while it is sitting on the sawhorses. Exceptions would be a heavy sink, such as cast iron. Other exceptions are possible, each installation can have unique problems that need to be thought thru.


